How to Connect to ASU Wi-Fi on a Chromebook
Note: Chromebook settings may vary slightly depending on device brand and Chrome OS version.
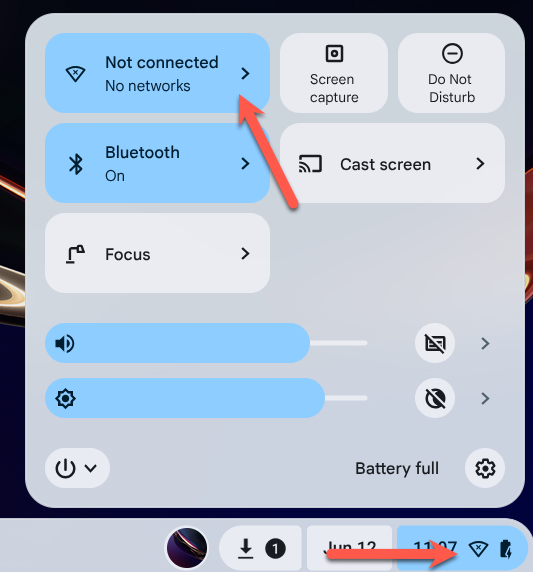
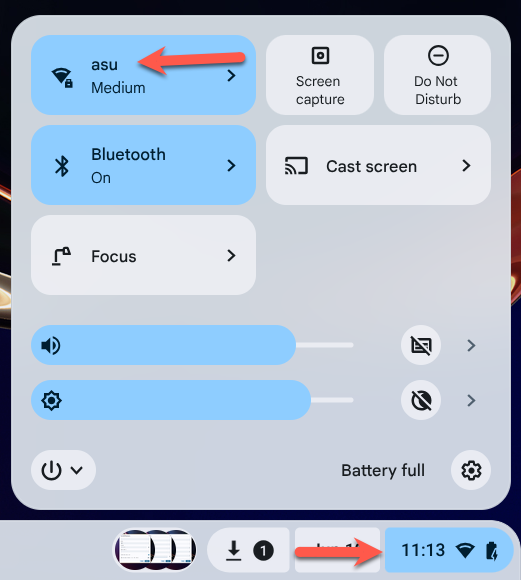
Step 1: Open Wi-Fi Settings
Click the status tray in the bottom-right corner of the screen (where the clock and battery icons are), then click the Wi-Fi button in the Quick Settings panel to view available networks.
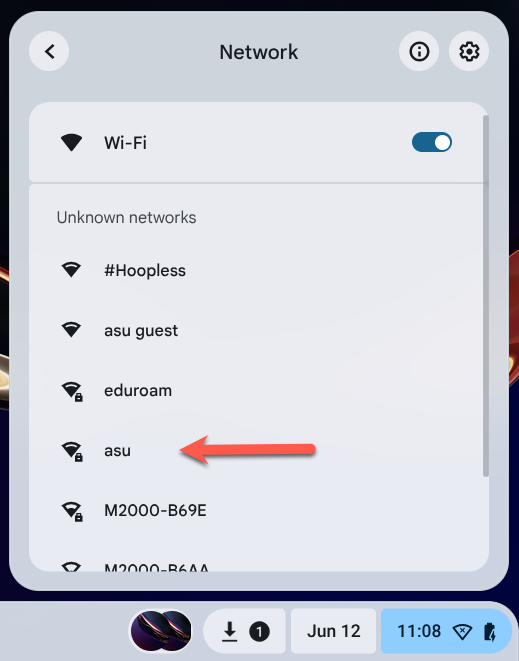
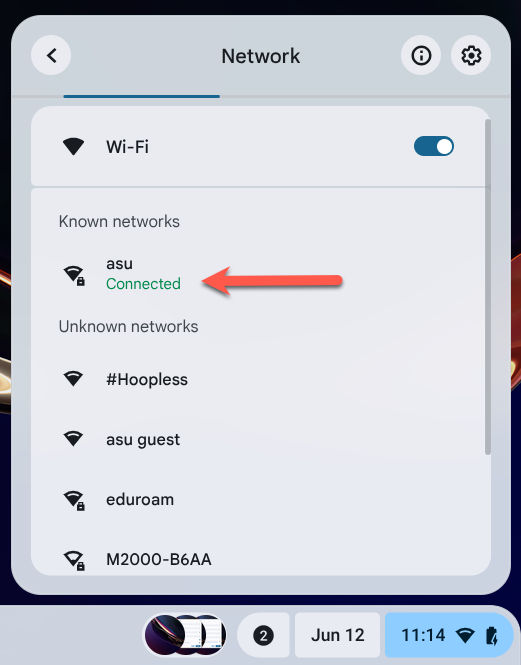
Step 2: Select the "asu" Wireless Network
From the list of available networks, select asu, the secure campus wireless network.
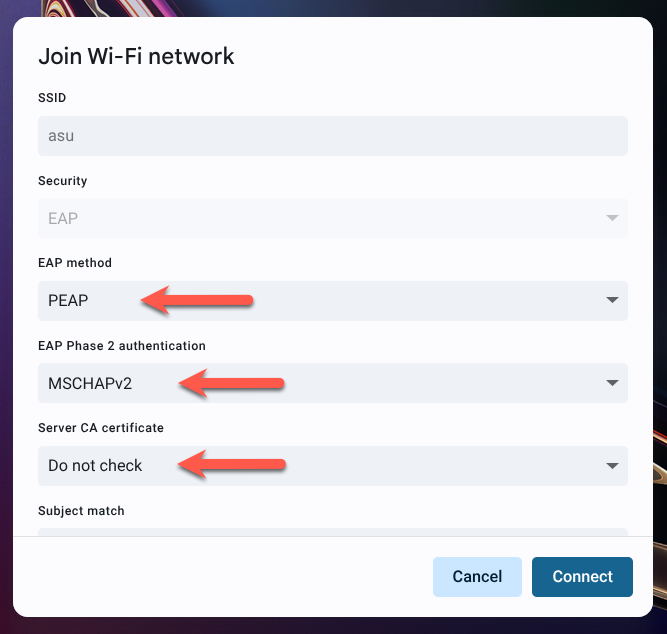
Step 3: Configure Network Settings
When prompted, enter the following:
- EAP Method: PEAP
- EAP Phase 2 Authentication: MSCHAPv2
- Server CA Certificate: Do not check / Default (or "Do not validate" if available)
- Subject Match: (Leave blank)
- Subject Alternative name match: (Leave blank if shown, or use default)
- Domain suffix match: (Leave blank)
- Identity: Your ASURITE ID (e.g.,
jdoe1) - Password: Your ASURITE password
- Anonymous Identity: (Leave blank)
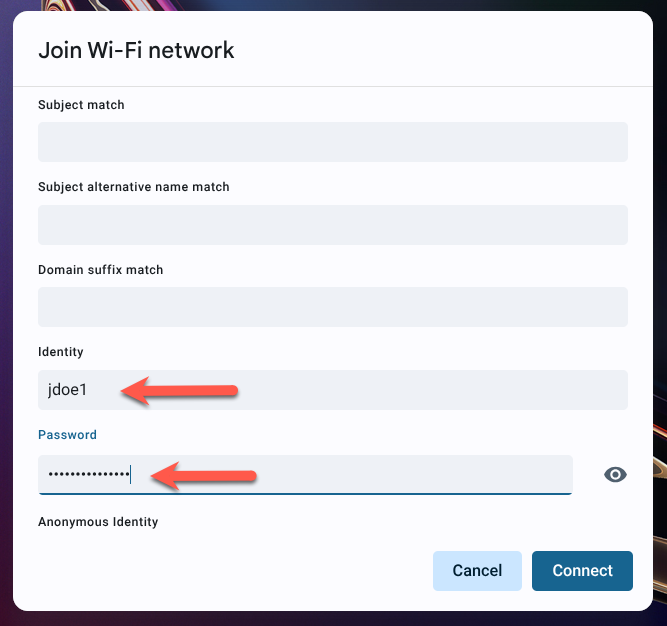
Note: If you see a field labeled "Domain Suffix Match", leave it blank unless you’ve been instructed to enter a specific domain such as asu.edu.
Tip: If the connection fails, try setting the Server CA Certificate option to “Do not validate” or “Do not check” instead of “Default”
Step 4: Click Connect
Click Connect. You can confirm you're connected by checking the status tray, viewing the Quick Settings panel, or looking for the network in the list of Wi-Fi connections.
Additional Notes
- Ensure your Chromebook is updated to the latest Chrome OS version.
- If you're having trouble, try forgetting the network and re-adding it using the above settings.
Need Help?
- Use 24/7 Live Chat via your My ASU Service Center
- Create a support case
- Call the ASU Experience Center: 855-278-5080
