To install SAS on your personal system, please follow the steps below:
Please Note: SAS is only available on Windows Operating Systems
1. Start Windows
2. Close ALL other Windows applications including virus-scanning programs.
3. Extract zip file to your local Windows system.
- Run the setup.exe from the folder.
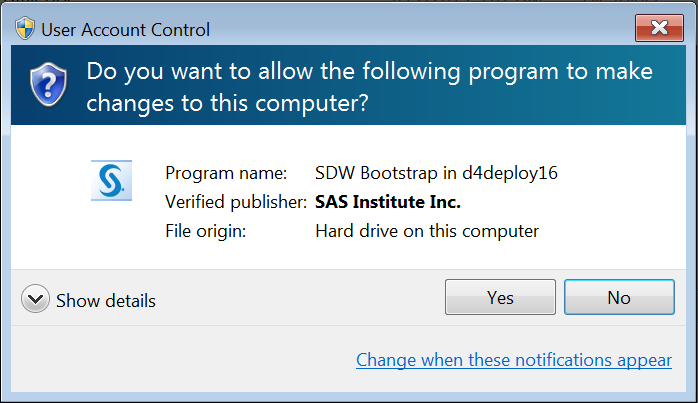
- Once you run this you should be prompted by User Account Control (UAC). Click Yes.
4. In the Choose Language window, choose the setup Language of your choice and select OK:
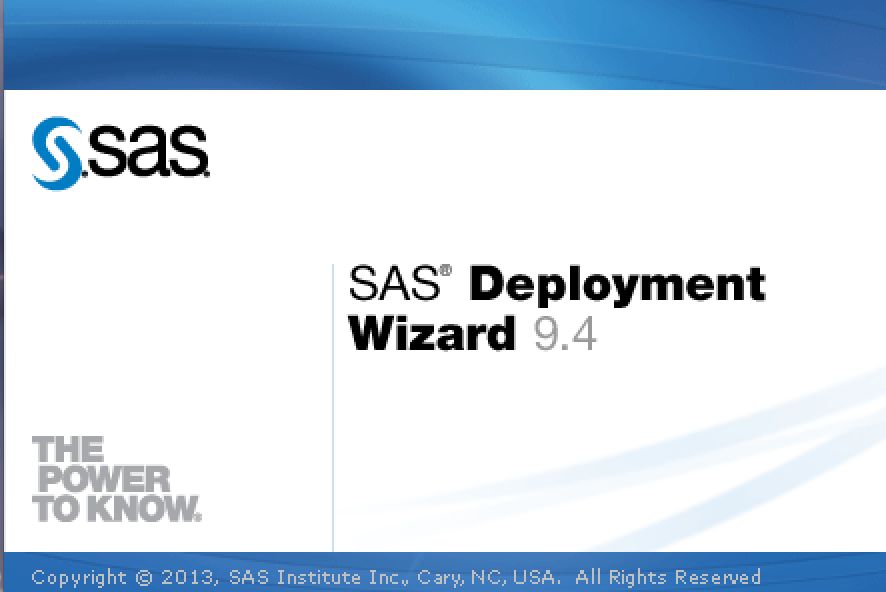
5. The SAS Deployment Wizard 9.4 splash screen should appear:
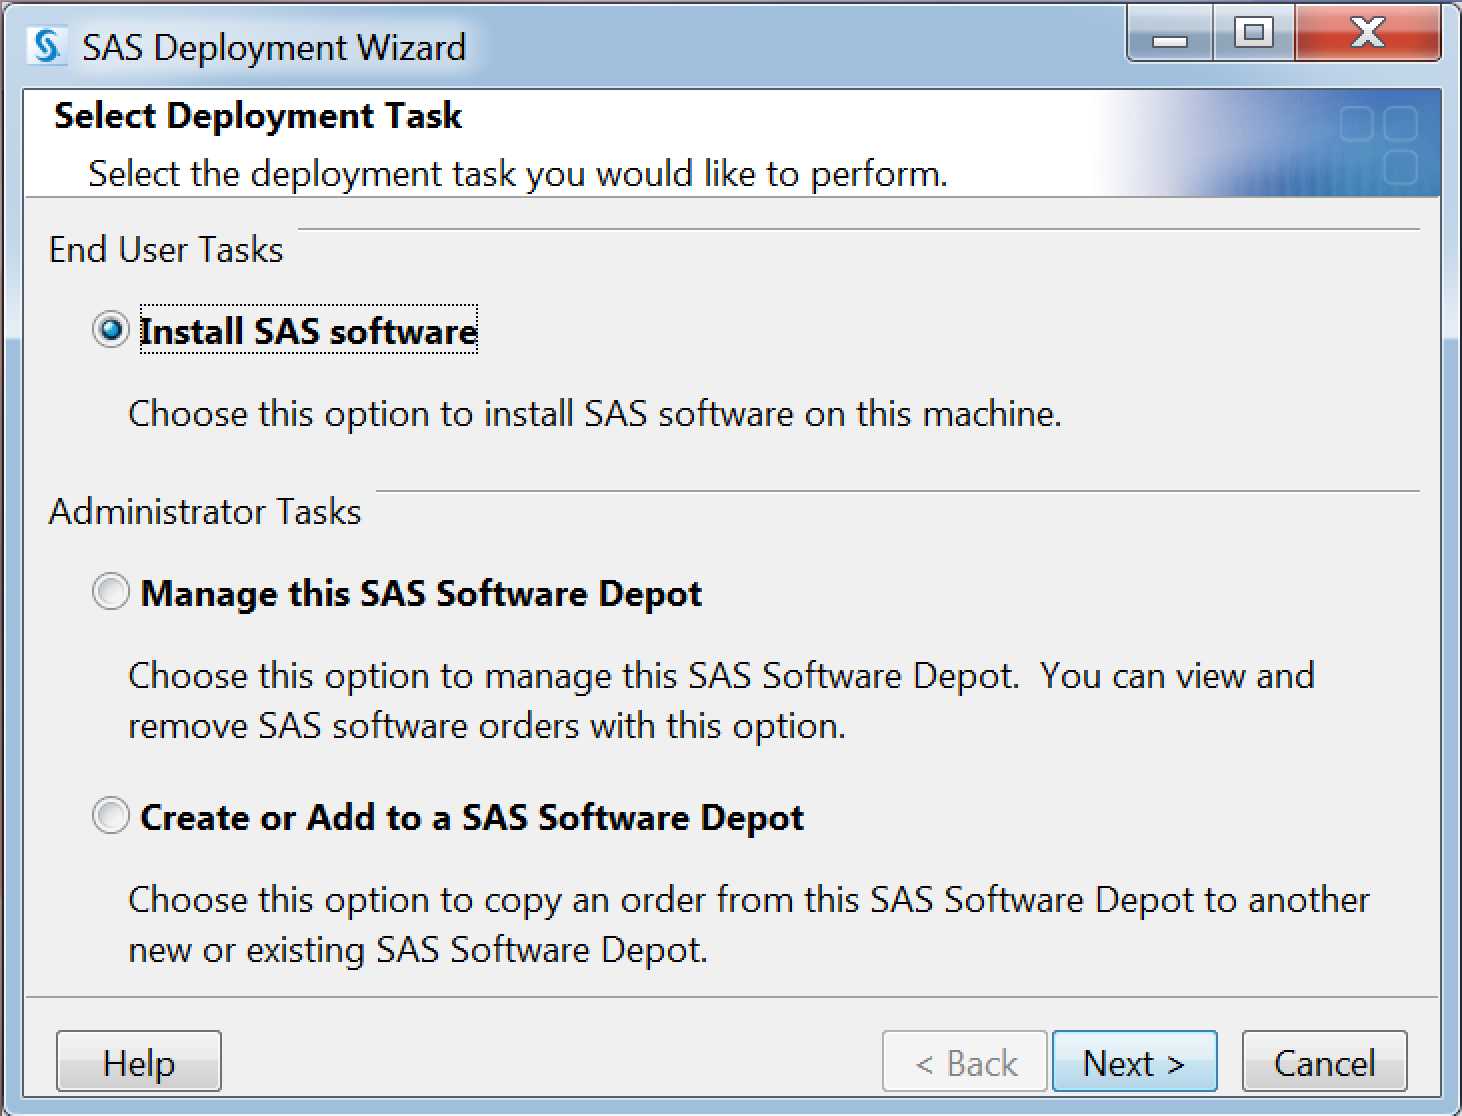
6. On the SAS Deployment Wizard screen, select Install SAS Software and click Next:
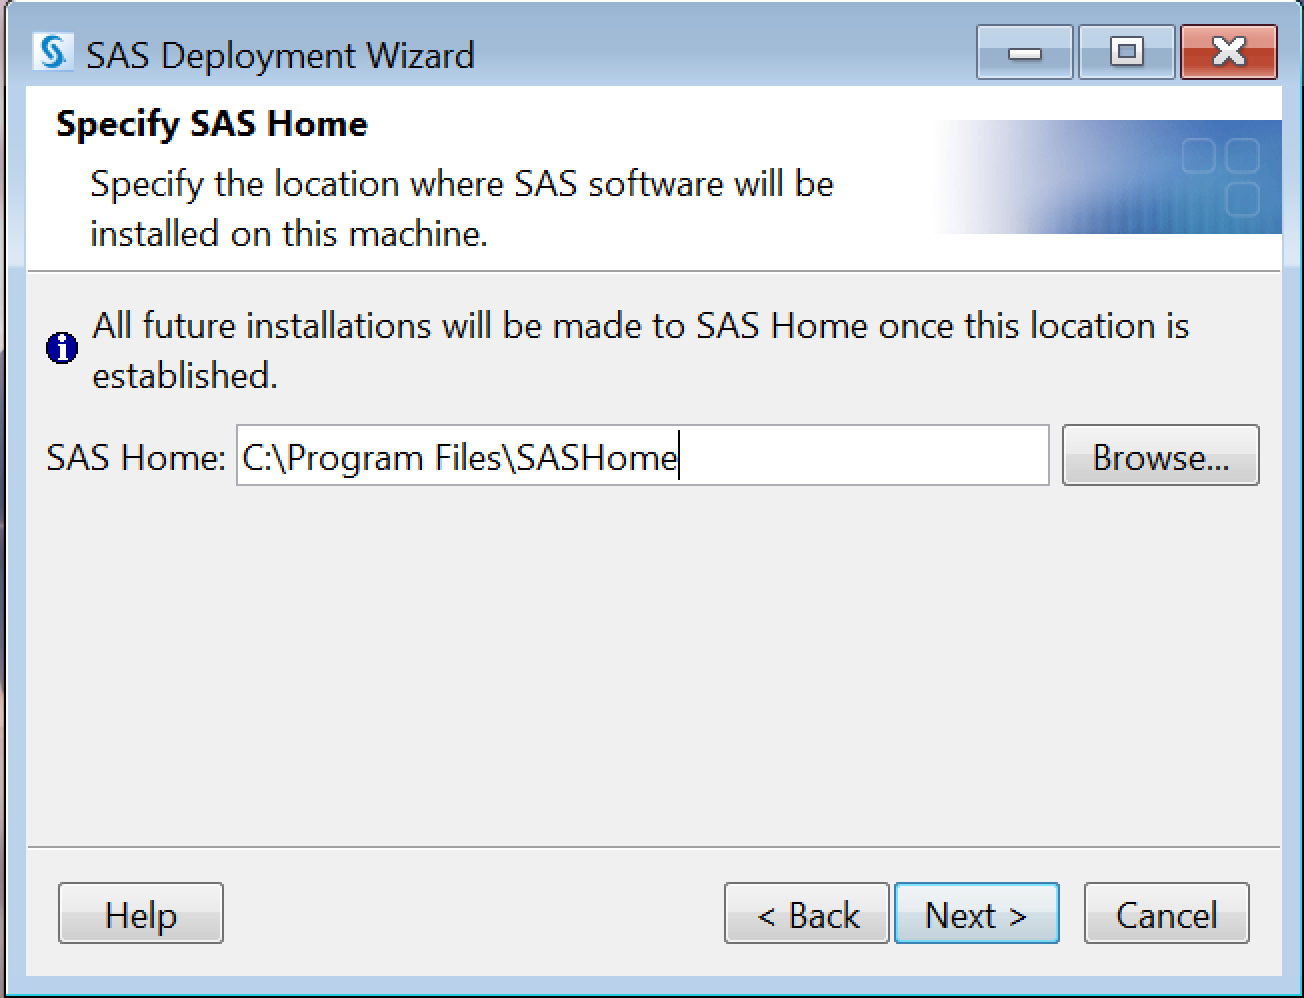
7. The Specify SAS Home screen may appear.
- If a previous version of SAS is installed on your computer, for SAS Home enter the following path: C:\Program Files\SAS94
- If you do NOT have a previous version on SAS installed, select Next:
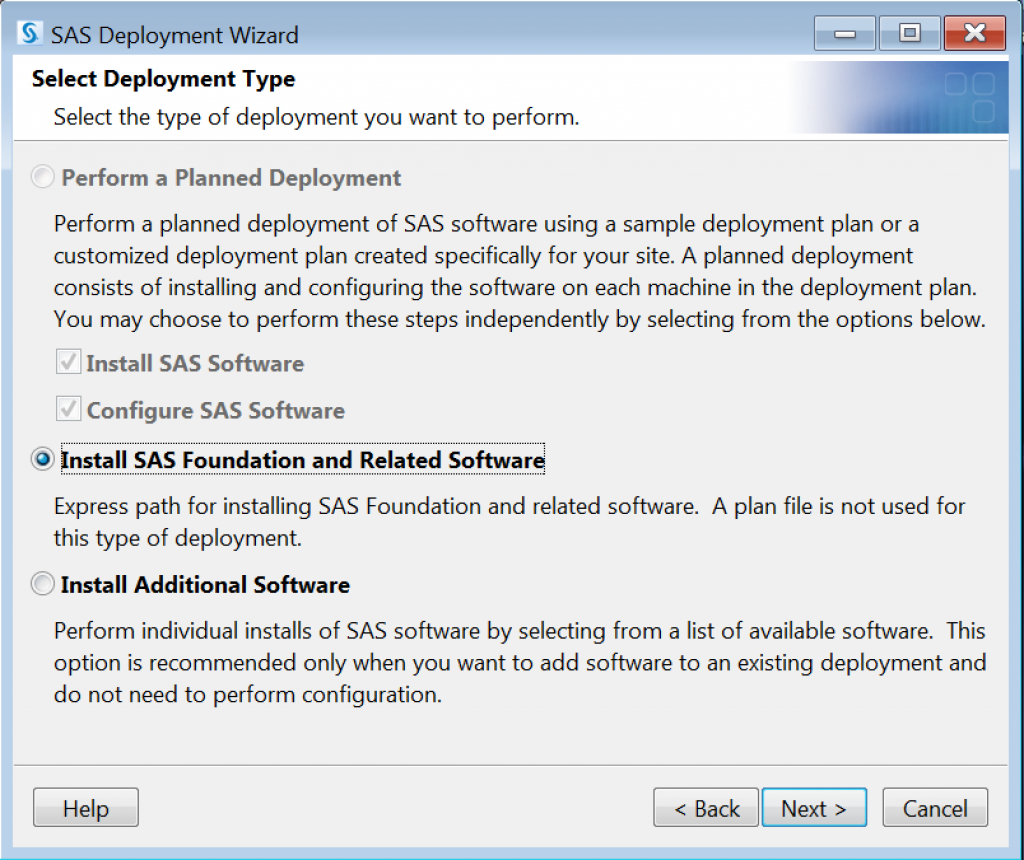
8. On the Select Deployment Type screen select Install SAS Foundation and Related Software, select Next:
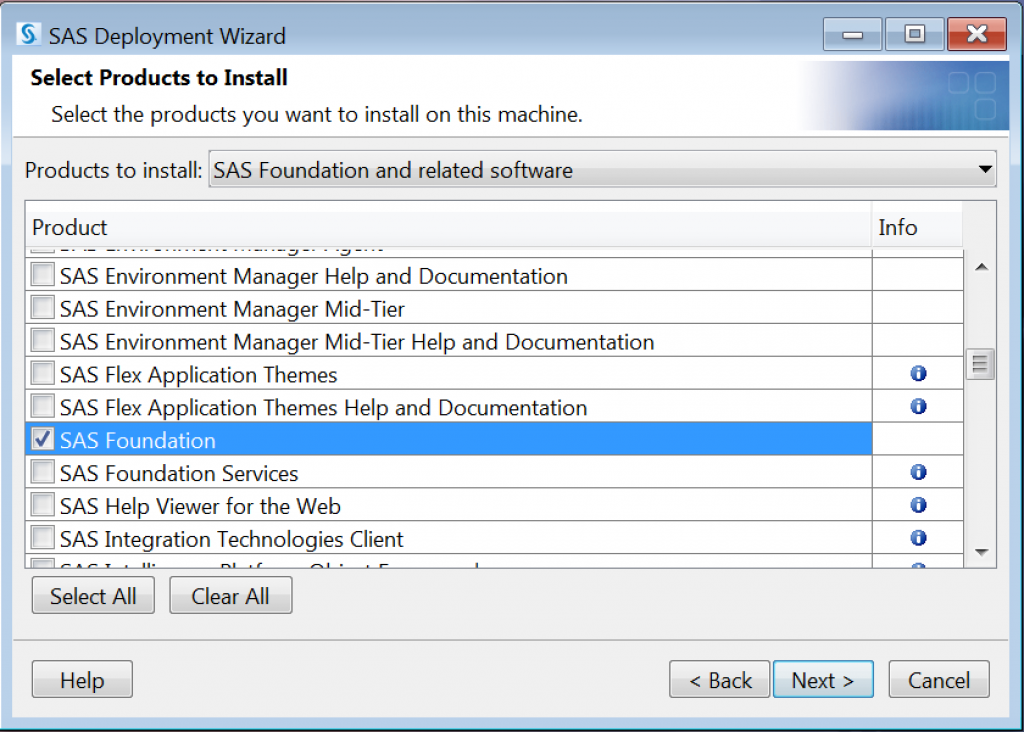
9. On the Select Products to Install screen, leave the defaults that are checked or select the SAS Foundation products that you want to install.
Click Next to continue.
a. You may be prompted to Select SAS Enterprise Guide Mode click Next to continue.
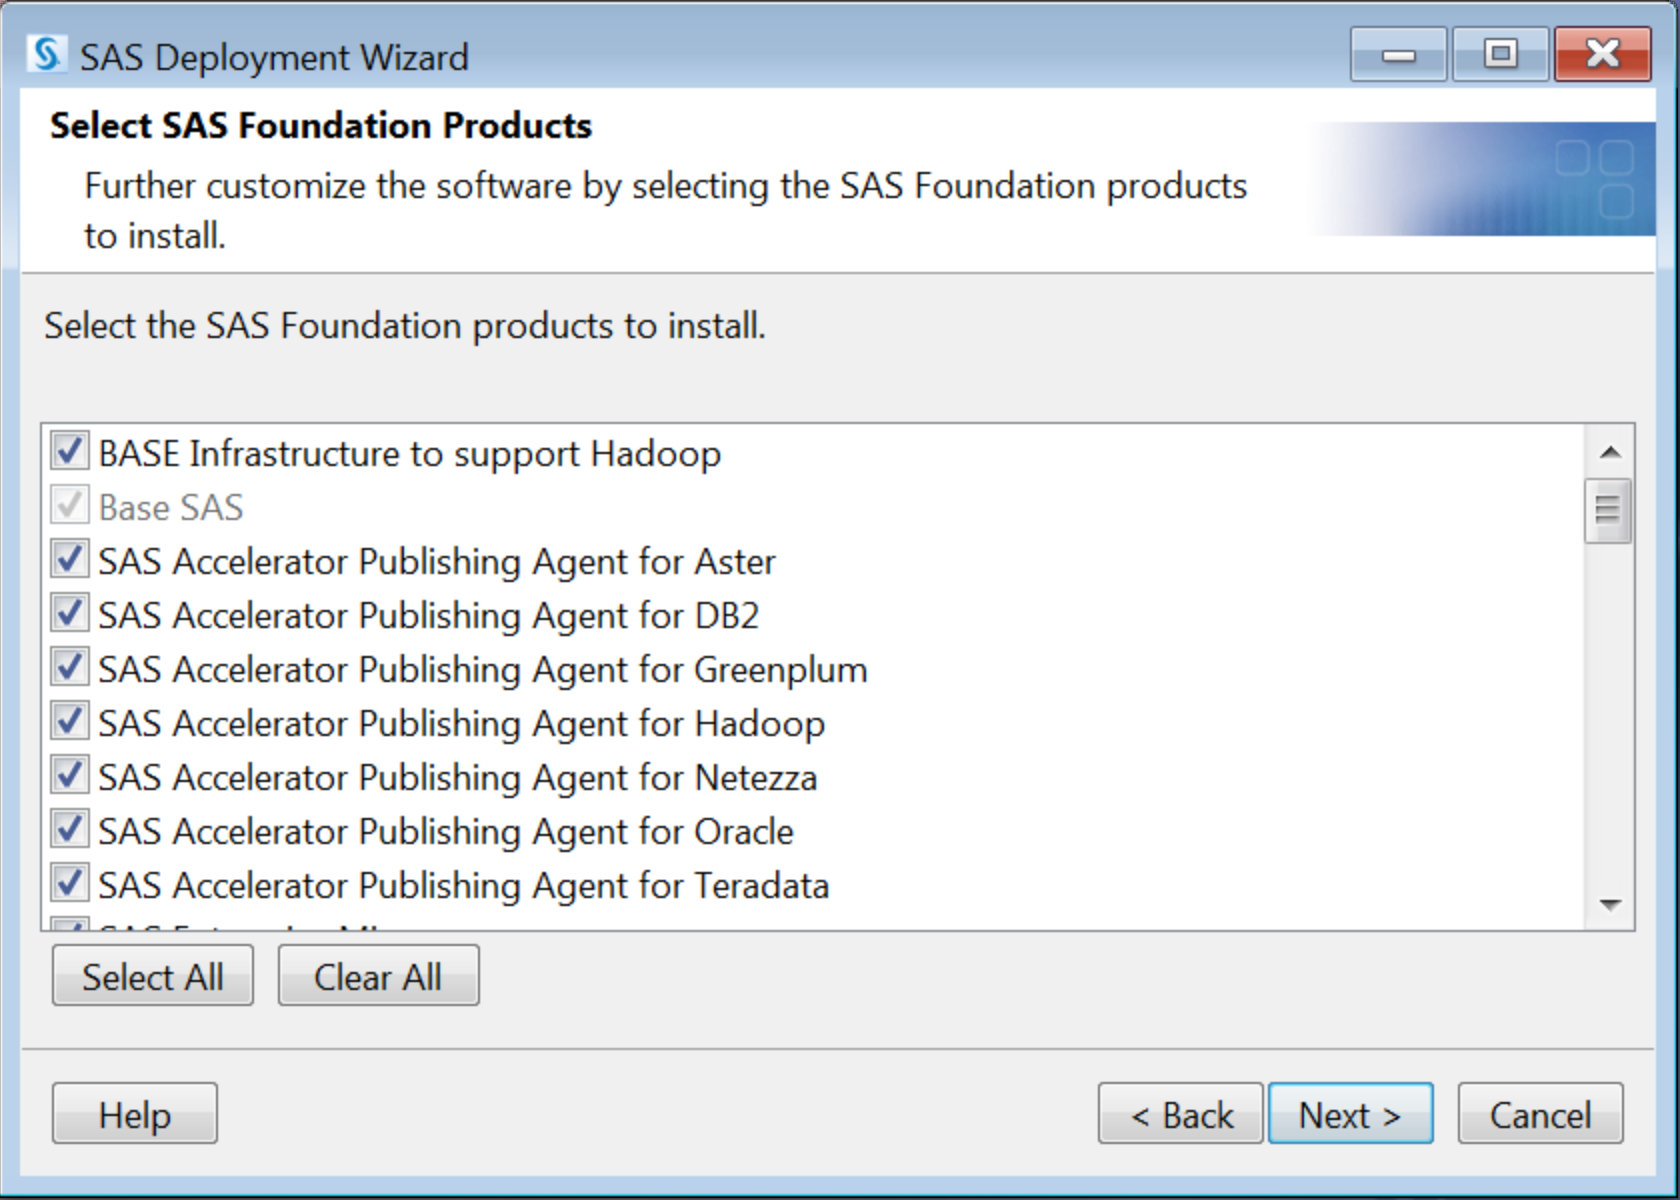
b. On the Select SAS Foundation Products, leave the defaults selected or choose which products to install.
Click Next to continue.
11. On the Specify SAS Installation Data File, select Next:
Please note: If the SAS Installation Data File on the media is expired please go to My Apps and download an updated SAS Installation Data File.
12. On the Select Language Support screen, click the Clear All button to remove all languages except English and click Next:
13. In the Select Regional Settings dialog box, either leave the default (English (United States) [en_US]) or select a different regional setting from the drop-down list box.
Click Next to continue.
14. On the Default Product for SAS File Types screen, Select SAS Foundation (64-bit) then click Next:

15. Leave the default Host Name and Port Number. Click Next to continue.
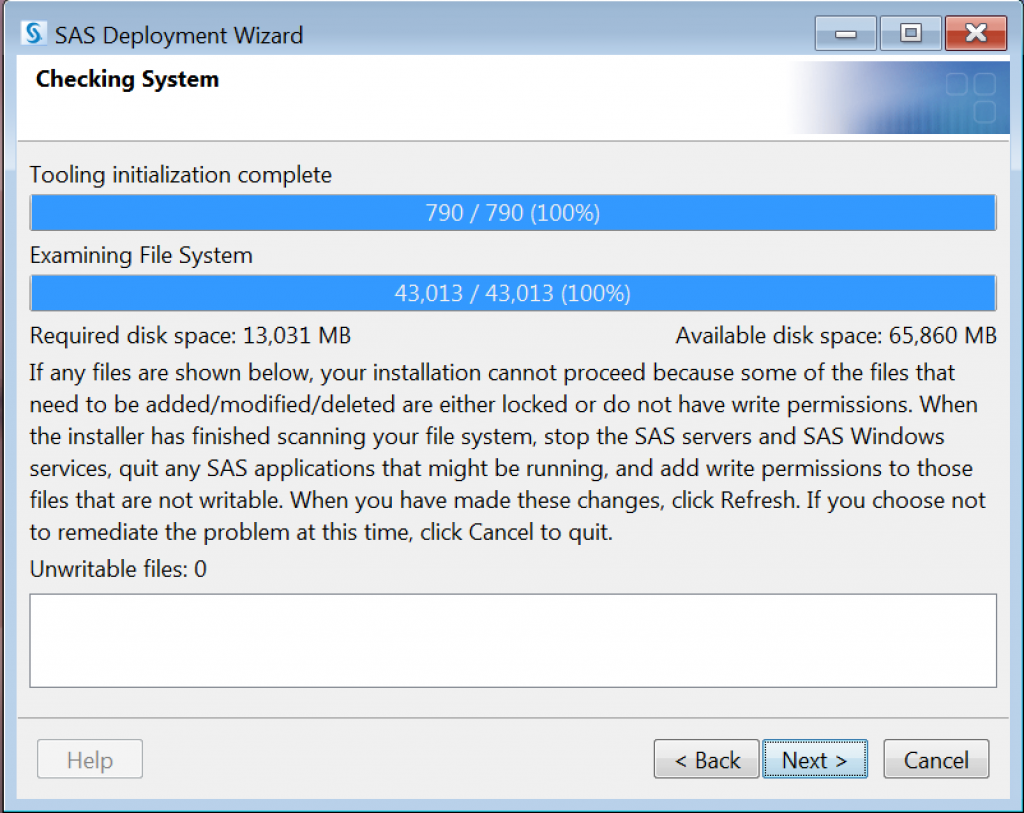
16. In the Checking System dialog box, you do not click Next. Once the installation runs through the loading installation package, it proceeds to the next Checking System dialog box automatically.
17. Here, the SAS Deployment Wizard verifies the amount of free disk space and verifies that the files and directories that can be written. Click Next when it is finished calculating.
18. On the Deployment Summary screen, select Start to begin the installation:
- The Systems Requirements Wizard may install additional components that may require system restart(s).
- Depending on the products you have selected to install, several additional screens may appear.
- This installation process will take longer than most installations. Your install time will depend on the SAS products you selected to install and the speed of your hardware.
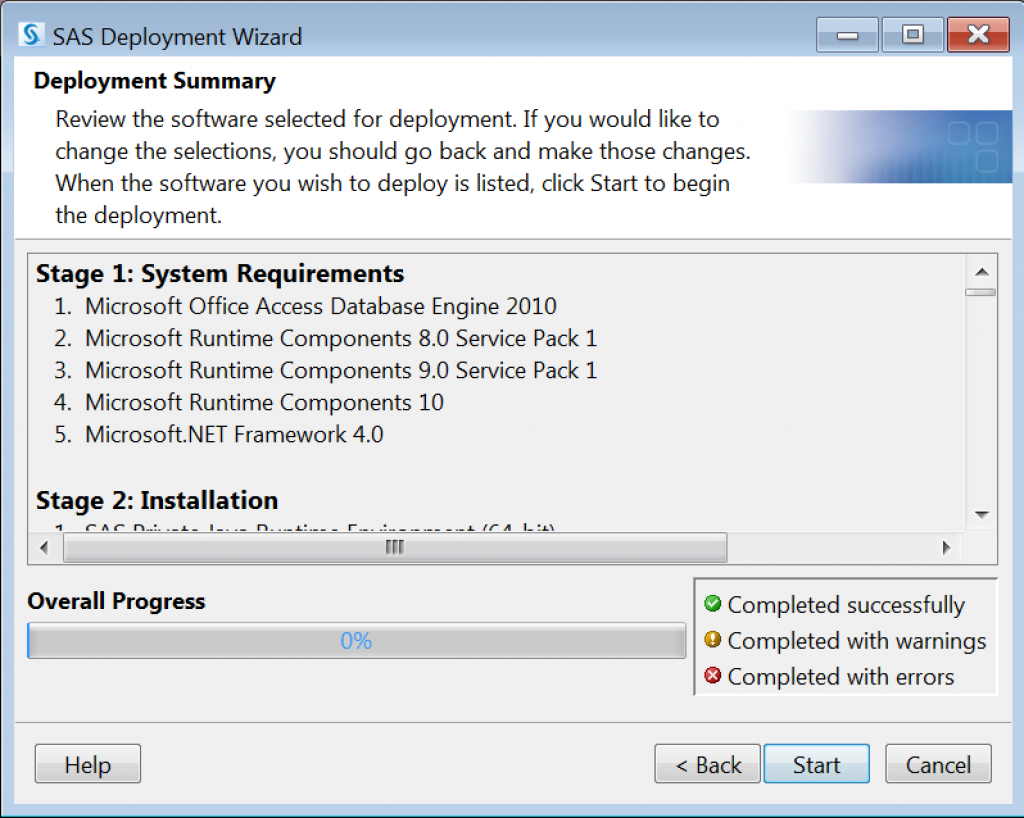
a. Once the installation has completed then click Next.
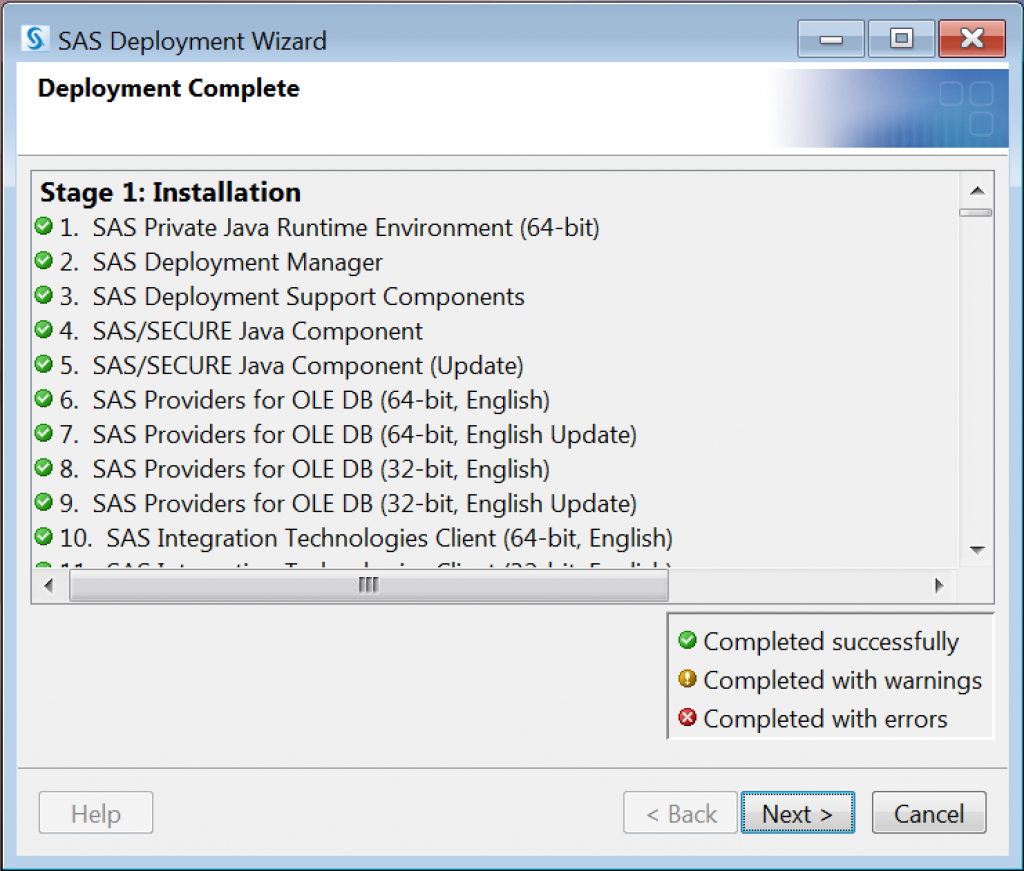
19. On the Select Support Option screen select Next.
20. On the Additional Resources screen select Finish.
Related Article: SAS License File Installation Update
Need additional help? Access 24/7 live chat, create a case from your My ASU Service Center or call 855-278-5080.


